
Master Janitor AI Profile Customization: Complete CSS Guide for Stunning Profiles
Table of Contents
- Understanding Janitor AI Profile Structure
- Getting Started: Setting Up Your Workspace
- Essential CSS Customization Techniques
- Advanced Profile Decoration
- Code Examples and Templates
- Conclusion and Next Steps
In the rapidly evolving world of AI chatbots and character interaction platforms, standing out from the crowd has never been more important. With over 35,000 unique AI characters on Janitor AI and millions of users exploring the platform daily, your profile serves as your digital identity in this vibrant community.
Profile customization isn’t just about aesthetics—it’s about creating a memorable first impression that reflects your personality and attracts like-minded users to your content. CSS customization transforms your basic Janitor AI profile into a visually stunning showcase that captures attention and builds engagement.
Whether you’re a complete beginner or someone looking to enhance their existing profile, this comprehensive guide will walk you through everything you need to know about Janitor AI CSS customization. You’ll discover step-by-step techniques, copy-paste code snippets, and professional design tips that will elevate your profile from ordinary to extraordinary.
By the end of this tutorial, you’ll have the knowledge and tools to create a unique, personalized profile that stands out in the Janitor AI community while maintaining a professional and cohesive appearance.
Understanding Janitor AI Profile Structure
Before diving into CSS customization, it’s essential to understand the fundamental structure of your Janitor AI profile and how CSS works within this framework.
Key Profile Elements You Can Customize
Janitor AI profiles consist of several customizable elements that work together to create your unique digital presence:
- Profile Picture and Username: Your primary visual identifier and unique handle on the platform
- About Me Section: The most important area for CSS customization—this is where all your code will be placed
- Character Cards: Display your created characters with customizable styling
- Links and Navigation: Interactive elements that can be styled with hover effects and color changes
- Dividers and Borders: Visual separators that can be customized to match your theme.
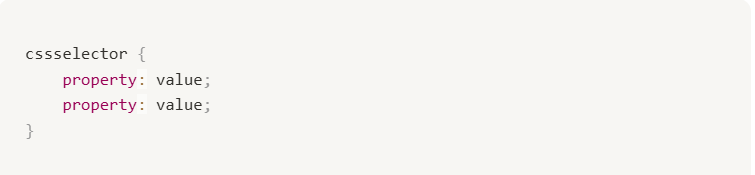
CSS Basics for Janitor AI
CSS (Cascading Style Sheets) is the language that controls how your profile appears visually. For Janitor AI customization, you’ll primarily work with:
- Selectors: Target specific elements (e.g.,
afor links,imgfor images) - Properties: Define what you want to change (e.g.,
color,background-color,filter) - Values: Specify how you want it changed (e.g.,
#FF0000for red,60%for opacity)
Understanding the Janitor AI Interface
Navigation is crucial for effective customization. The key areas you’ll interact with include:
- Profile Settings: Access through the dropdown menu in the top-right corner
- Edit Profile Button: Found on your profile page for basic customization
- About Me Section: Located in profile settings—your CSS coding workspace
- Preview Area: See changes reflected in real-time after updating your profile
This foundational knowledge will help you write targeted CSS rules that achieve your desired visual effects while maintaining compatibility with Janitor AI’s platform structure.
Getting Started: Setting Up Your Workspace
Success in CSS customization starts with proper preparation. Follow these detailed steps to access your customization workspace safely and efficiently.
Step-by-Step Access to Profile Settings
Navigate to Your Profile:
- Log into your Janitor AI account.
- Click on your profile picture in the top-right corner.
- Select “Profile” from the dropdown menu to view your current profile.
- Click your profile picture again and select “Settings”.
- Scroll down to locate the “About me” section.
This About me section is your CSS workspace—all customization code will be placed here.
Essential Safety Tips and Best Practices
- Always backup your existing content before making changes. Copy any existing text in your About me section to a separate document.
- Test changes incrementally rather than adding large amounts of code at once. This approach helps you identify issues quickly and maintain a working profile.
- Use the “Update Profile” button after each change to see your modifications in real-time. Don’t forget this crucial step—changes won’t appear until you save them.
Common Mistakes to Avoid
- Don’t use external image hosting for critical elements without reliable backup sources. Broken image links can ruin your profile’s appearance.
- Avoid overloading your profile with excessive CSS code. Too much customization can slow loading times and create visual clutter.
- Test your profile on different devices to ensure your customisations work across desktop and mobile platforms.
- Keep your CSS organized with comments and proper indentation. This makes future edits much easier and prevents errors.
Getting HEX Color Codes
HEX codes are essential for color customization. To find them:
- Click “Edit profile” on your profile page.
- Select “Change background color”.
- Choose your desired color from the palette.
- Copy the HEX code that appears (e.g., #F8B6D9).
- Use this code in your CSS styling.
This systematic approach ensures you have complete control over your profile’s appearance while maintaining stability and functionality.
Essential CSS Customization Techniques
Master these fundamental techniques to transform your Janitor AI profile into a visually stunning showcase. Each method builds upon the previous one, creating a cohesive and professional appearance.
Link Styling: Colors and Hover Effects
Links are crucial interactive elements that deserve special attention. Here’s how to customize them for maximum impact:
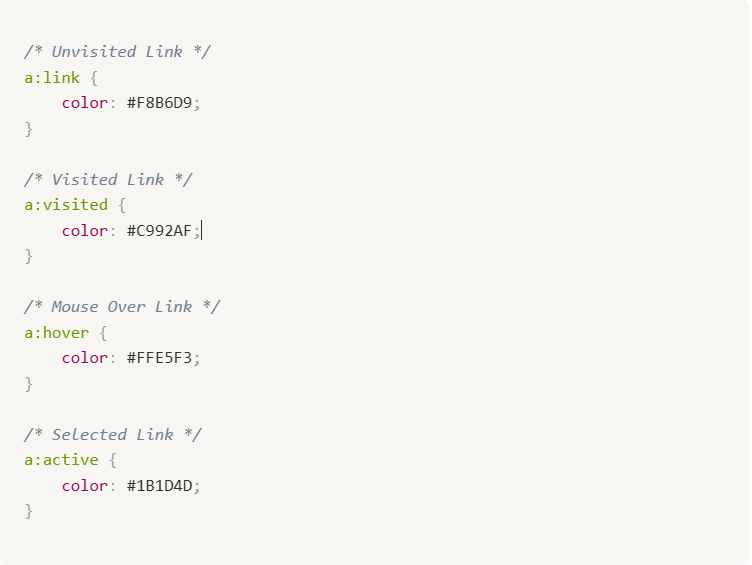
This code creates a dynamic link experience where colors change based on user interaction. The hover effect (:hover) is particularly important for user engagement, providing immediate visual feedback when users move their cursor over links.
Image Filters and Visual Effects
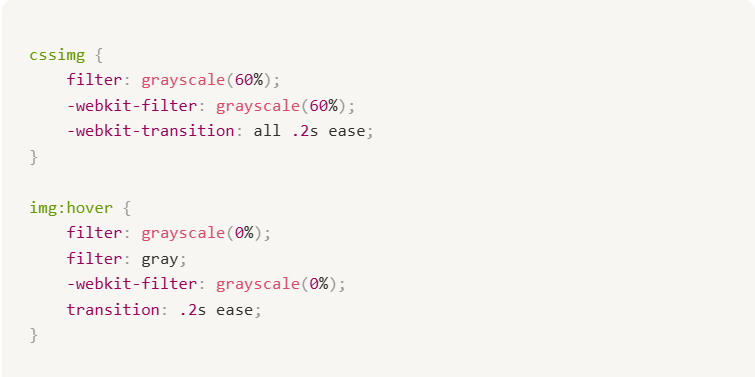
This creates a striking visual effect where images appear in grayscale by default but reveal full color when users hover over them. The transition property adds smooth animation, making the effect feel polished and professional.
Background and Theme Customization

Choose colors that complement your overall theme. Consider using color theory principles—analogous colors create harmony, while complementary colors create contrast and visual interest.
Font and Text Styling
Typography significantly impacts readability and aesthetic appeal:
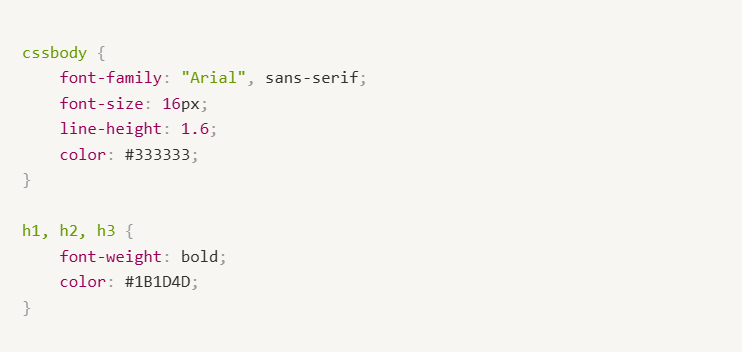
Professional typography enhances credibility and makes your profile content more accessible to readers across different devices.
Advanced Color Schemes
Create sophisticated color palettes using CSS custom properties for easy maintenance:
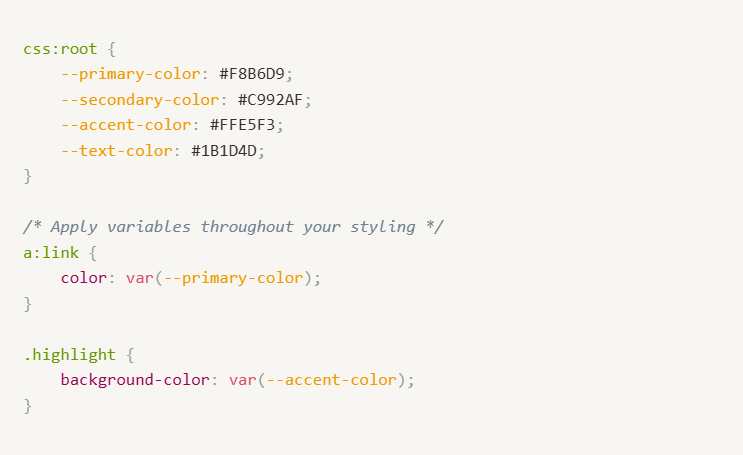
This approach ensures consistency and makes it easy to update your entire color scheme by changing just a few values.
Testing Your Customizations
Always test your changes using the “Update Profile” button after each modification. This incremental approach helps you identify issues quickly and maintain a functional profile while experimenting with new techniques.
Advanced Profile Decoration
Elevate your profile beyond basic customization with these sophisticated techniques that create truly unique and memorable visual experiences.
Divider Styling and Visual Separation
Dividers help organize your content and create visual hierarchy. Customize them to match your theme:
This code transforms standard dividers into styled elements that complement your color scheme. Experiment with different border styles (dotted, dashed, double) to create unique visual effects.
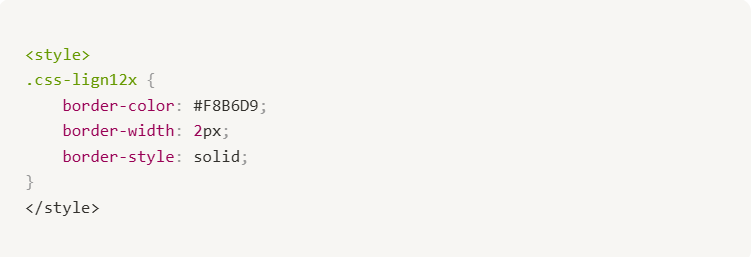
Border Effects and Container Styling
Add sophistication with custom borders around profile elements:
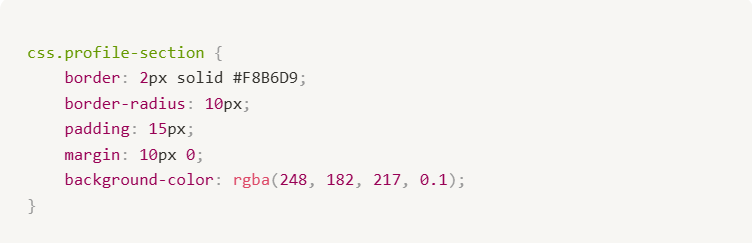
Border-radius creates smooth, modern corners while padding ensures content doesn’t touch the edges. The semi-transparent background (using rgba) adds depth without overwhelming your content.
Animation and Transition Effects
Subtle animations enhance user experience without being distracting:
css.animated-element {
    transition: all 0.3s ease;
    transform: scale(1);
}

.animated-element:hover {
    transform: scale(1.05);
    box-shadow: 0 4px 8px rgba(0, 0, 0, 0.2);
}
This creates a gentle scaling effect when users hover over elements, accompanied by a subtle shadow that adds depth.
Custom Layout Techniques
Create unique layouts that set your profile apart:
css.two-column-layout {
    display: flex;
    gap: 20px;
    flex-wrap: wrap;
}

.column {
    flex: 1;
    min-width: 300px;
}

@media (max-width: 768px) {
    .two-column-layout {
        flex-direction: column;
    }
}
This responsive layout adapts to different screen sizes while maintaining visual appeal across devices.
Profile Cohesion Strategies
Maintain consistency throughout your profile with these professional techniques:
- Color Harmony: Use no more than 3-4 colors throughout your design. Choose one primary color, one secondary color, and one accent color.
- Typography Consistency: Limit yourself to 2-3 font families maximum. Use one for headings and one for body text.
- Spacing Standards: Establish consistent margins and padding values. Use multiples of 5 or 10 for clean, professional spacing.
- Visual Weight Balance: Distribute visual elements evenly across your profile. Avoid clustering all decorative elements in one area.
Advanced Selector Techniques
Target specific elements with precision:
css*/* Style every second paragraph */*
p:nth-child(2n) {
    background-color: #f9f9f9;
    padding: 10px;
}

*/* Style the first letter of paragraphs */*
p:first-letter {
    font-size: 1.5em;
    font-weight: bold;
    color: #F8B6D9;
}
These advanced selectors create sophisticated effects that demonstrate mastery of CSS techniques while maintaining readability and usability.
Code Examples and Templates
Ready-to-use code snippets that you can copy, paste, and customize for your Janitor AI profile. Each template is designed for easy implementation and modification.
Read the full breakdown: The Ultimate Review of 2025’s Best NSFW AI Character Apps – Explore the top uncensored AI companion apps, their features, pros & cons, and find the perfect fit for you. Read now →
Complete Profile Template: Modern Minimalist
css*/* Modern Minimalist Theme */*
body {
    font-family: "Segoe UI", Tahoma, Geneva, Verdana, sans-serif;
    background-color: #f8f9fa;
    color: #2c3e50;
    line-height: 1.6;
}

*/* Link Styling */*
a:link { color: #3498db; }
a:visited { color: #9b59b6; }
a:hover { color: #e74c3c; transition: color 0.3s ease; }
a:active { color: #2c3e50; }

*/* Image Effects */*
img {
    border-radius: 8px;
    filter: brightness(0.95) contrast(1.1);
    transition: all 0.3s ease;
}

img:hover {
    filter: brightness(1.05) contrast(1.2);
    transform: scale(1.02);
}

*/* Divider Styling */*
<style>
.css-lign12x {
    border-color: #3498db;
    border-width: 1px;
    opacity: 0.6;
}
</style>
Dark Theme Template
*/* Dark Theme Profile */*
body {
    background-color: #2c3e50;
    color: #ecf0f1;
    font-family: "Roboto", sans-serif;
}

*/* Dark Theme Links */*
a:link { color: #74b9ff; }
a:visited { color: #a29bfe; }
a:hover { color: #fd79a8; }
a:active { color: #fdcb6e; }

*/* Dark Theme Images */*
img {
    filter: brightness(0.9) sepia(0.1);
    border: 2px solid #34495e;
}

img:hover {
    filter: brightness(1.1) sepia(0);
    border-color: #74b9ff;
}

*/* Dark Dividers */*
<style>
.css-lign12x {
    border-color: #34495e;
    border-width: 2px;
}
</style>
Colorful Creative Template
css*/* Vibrant Creative Theme */*
body {
    background: linear-gradient(135deg, #667eea 0%, #764ba2 100%);
    color: #ffffff;
    font-family: "Poppins", sans-serif;
}

*/* Rainbow Links */*
a:link { color: #ff6b6b; }
a:visited { color: #4ecdc4; }
a:hover {
    color: #ffe66d;
    text-shadow: 0 0 10px rgba(255, 230, 109, 0.8);
}
a:active { color: #a8e6cf; }

*/* Creative Image Effects */*
img {
    border-radius: 50%;
    border: 3px solid #ffffff;
    filter: hue-rotate(0deg) saturate(1.2);
    transition: all 0.5s ease;
}

img:hover {
    filter: hue-rotate(45deg) saturate(1.5);
    transform: rotate(5deg) scale(1.1);
}

*/* Gradient Dividers */*
<style>
.css-lign12x {
    border-image: linear-gradient(90deg, #ff6b6b, #4ecdc4, #ffe66d) 1;
    border-width: 3px;
}
</style>
Professional Business Template
*/* Professional Business Theme */*
body {
    font-family: "Arial", sans-serif;
    background-color: #ffffff;
    color: #333333;
    line-height: 1.8;
}

*/* Professional Links */*
a:link { color: #0066cc; text-decoration: underline; }
a:visited { color: #551a8b; }
a:hover { color: #004499; background-color: #f0f8ff; }
a:active { color: #000080; }

*/* Clean Image Styling */*
img {
    border: 1px solid #ddd;
    padding: 5px;
    background-color: #f9f9f9;
}

img:hover {
    border-color: #0066cc;
    box-shadow: 0 2px 4px rgba(0, 102, 204, 0.3);
}

*/* Professional Dividers */*
<style>
.css-lign12x {
    border-color: #0066cc;
    border-width: 1px;
    border-style: solid;
}
</style>
Testing Your Template
Implementation Steps:
- Copy your chosen template code.
- Paste it into your “About me” section in profile settings.
- Click “Update Profile” to save changes.
- View your profile to see the results.
- Make adjustments as needed by modifying color values or effects.
Customization Tips
Personalize any template by:
- Changing HEX color codes to match your preferences.
- Adjusting font families to reflect your style.
- Modifying transition durations (0.3s is standard, 0.5s is slower).
- Experimenting with different filter effects on images.
Remember: Always test changes incrementally and keep backups of working code.
Conclusion and Next Steps
Congratulations! You now have the knowledge and tools to create a stunning, personalized Janitor AI profile that stands out in the community. From basic CSS fundamentals to advanced styling techniques, you’ve learned how to transform your profile into a professional showcase.
Key takeaways from this guide:
- CSS customization happens in your “About me” section.
- Start with basic techniques like link styling and image effects.
- Build complexity gradually with advanced features.
- Always test changes incrementally.
- Use ready-made templates as starting points for your unique designs.
Your next steps:
- Choose a template that matches your style and implement it.
- Experiment with colors and effects to make it uniquely yours.
- Join the community discussions about profile customization.
- Share your creations to inspire others.
Remember: The best profiles combine technical skill with personal creativity. Don’t be afraid to experiment, iterate, and refine your design over time.
Keep learning by exploring advanced CSS techniques, staying updated with Janitor AI platform changes, and connecting with other creators who share your passion for customization. Your profile is a reflection of your creativity—make it memorable!
Ready to transform your Janitor AI profile? Start with one of our templates and begin customizing today. Your unique, professional profile awaits!


Leave a Reply